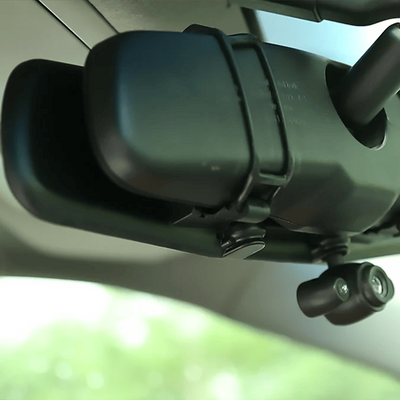
Running a dash cam enhances your driving experience, but dangling wires can ruin the aesthetics. Hiding wires effectively not only creates a cleaner look but also ensures safety. By following some simple strategies and techniques, you can achieve a professional installation at home. Whether you’re installing a traditional dash cam or a dash cam rear view mirror, proper wire management ensures the functionality and longevity of your device. Here’s a comprehensive guide to help you conceal wires efficiently and keep your car’s interior neat.
When purchasing a dash cam, select one designed for easy installation. Many modern models come with pre-planned cable routes or adhesive cable clips, making it simpler to hide wires. A mirror cam, for instance, combines functionality and sleekness, often requiring fewer visible wires. Choosing the right model can significantly reduce the time and effort needed for a clean setup, ensuring your installation is both functional and unobtrusive.
Planning is critical when installing a dash cam. Before securing anything, identify the best path for the wires. Use existing gaps in the car’s interior, such as along the windshield or the side panels. Mapping out your route reduces unnecessary wire exposure and avoids interference with airbags or other crucial systems. With a plan in place, you’ll achieve a streamlined setup while protecting your car’s components.
The car’s trim offers natural hiding spots for wires. By tucking cables under the A-pillar trim, you can keep them out of sight. Carefully remove the trim with the appropriate tools, place the wires, and snap it back into place. This technique not only hides the wires but also protects them from wear and tear, ensuring a long-lasting installation.
The windshield edge is an ideal spot for wire concealment. Using adhesive clips or plastic guides, you can route wires along the perimeter of the windshield. This method keeps cables secure while blending seamlessly with the car’s interior design. Avoid letting the wires dangle near the driver’s line of sight to maintain clear visibility.
If your dash cam requires a connection to a power source, route the wires through the glove box. The glove box acts as an intermediary, hiding any excess wire. This approach is particularly useful for compact cars with limited interior space. It also allows for easier access to the power cable when needed, ensuring convenience and cleanliness.
Connecting the dash cam to the car’s fuse box eliminates the need for long, visible wires. Using a hardwiring kit, you can draw power directly from the fuse box. This not only hides wires but also frees up the car’s cigarette lighter port for other uses. Ensure you follow the manufacturer’s instructions for a safe and reliable setup.
Keeping wires away from the driver’s footwell is essential for safety. Exposed wires in this area can create hazards, such as accidental disconnection or entanglement. Route the wires through areas that do not interfere with pedals or driver movements, ensuring a safer and cleaner installation.
Floor mats can also serve as an effective solution for hiding wires. Run the cables underneath the mats, securing them tightly to prevent movement. This method is especially useful for rear-facing dash cams or dual-channel systems. It ensures the wires remain hidden while protecting them from damage caused by foot traffic.
Excess wires can often make installations look untidy. Velcro straps are a quick and effective way to bundle and secure these wires. Once bundled, place them in a hidden area, such as under the dashboard or inside the center console. Velcro straps provide flexibility, allowing you to adjust the setup if needed.
Wireless dash cams eliminate the hassle of hiding wires entirely. These models use battery power or Wi-Fi connectivity to record footage. While they may require periodic charging, they provide a wire-free solution that maintains a clean interior. A wireless mirror cam can also be a great choice for those who value minimalism and modern design.
Before securing everything, test the dash cam to ensure all connections work correctly. Turn on the car and verify that the camera powers up and records as expected. Testing beforehand saves time and effort, allowing you to adjust the wire routing if necessary. Once confirmed, finalize the setup by securing the wires in place.
While hiding wires is essential, ensure they remain accessible for future maintenance or upgrades. Avoid permanently sealing wires behind panels or trim that may be difficult to remove. By balancing concealment and accessibility, you’ll create a practical and professional installation that’s easy to manage in the long term.
Hiding dash cam wires can feel overwhelming for first-timers. Issues such as loose cables or interference with car systems are common concerns. Research your car’s layout and invest in quality tools for a smoother process. Learning from others’ experiences or consulting a professional can also help alleviate challenges.
To keep wires secure, use adhesive clips, cable ties, or Velcro straps. These tools ensure that the cables stay in place without damaging your car’s interior. For added security, route wires through existing gaps and under panels.
While it’s possible to install a dash cam without hiding wires, it’s not recommended. Exposed wires can be unsightly and pose safety risks. Concealing wires improves aesthetics and prevents accidental damage or disconnection.
Professional installation ensures a clean and secure setup, especially for hardwired systems. However, with proper tools and guidance, you can achieve a professional-looking result at home. Follow detailed instructions and take your time to avoid mistakes.
|
|